

As a computer science student, I have had the opportunity to explore various areas in the tech field, including the fascinating world of IoT technology. In my second year of college, I worked on several IoT projects, including a simple robot car controlled by Wi-Fi using Blinkit, a hand gesture-controlled robocar, and a strong metal-bodied warrior car intended for fighting. In this blog, I will share my experience working on these projects and provide some beginner-friendly education on IoT technology.
Project 1: Wi-Fi Controlled Robo Car
One of my initial projects was to build a Wi-Fi-controlled robo car, which helped me to understand the basics of robotics and IoT.
To power the motors of the vehicle, I used an ESP32 microcontroller and an L298N motor driver to control the motors of the car. I also used a NodeMCU WiFi module to enable remote control of the car through a smartphone app. The Blinkit app was used to control the car wirelessly over WiFi to transmit the signals to the microcontroller on the car.
Here is the Python code used for the ESP32 microcontroller:
import machine
import network
import socket
import time

# Set up the WiFi connection
wlan = network.WLAN(network.STA_IF)
wlan.active(True)
wlan.connect('SSID', 'password')
while not wlan.isconnected():
    time.sleep(1)
print('WiFi connected')

# Set up the motor driver pins
motor1A = machine.Pin(19, machine.Pin.OUT)
motor1B = machine.Pin(18, machine.Pin.OUT)
motor2A = machine.Pin(23, machine.Pin.OUT)
motor2B = machine.Pin(5, machine.Pin.OUT)

# Define the functions to control the movements of the car
def moveForward():
    motor1A.on()
    motor1B.off()
    motor2A.on()
    motor2B.off()

def moveBackward():
    motor1A.off()
    motor1B.on()
    motor2A.off()
    motor2B.on()

def turnLeft():
    motor1A.off()
    motor1B.on()
    motor2A.on()
    motor2B.off()

def turnRight():
    motor1A.on()
    motor1B.off()
    motor2A.off()
    motor2B.on()

# Set up the socket connection to receive commands from the Blinkit app
s = socket.socket(socket.AF_INET, socket.SOCK_STREAM)
s.bind(('', 80))
s.listen(5)
print('Socket listening')

while True:
    conn, addr = s.accept()
    print('Got connection from', addr)
    data = conn.recv(1024).decode()
    print('Received', data)
    if 'forward' in data:
        moveForward()
    elif 'backward' in data:
        moveBackward()
    elif 'left' in data:
        turnLeft()
    elif 'right' in data:
        turnRight()
This code sets up the ESP32 microcontroller to connect to a WiFi network and then listens for incoming commands through a socket connection. The moveForward(), moveBackward(), turnLeft(), and turnRight() functions control the movements of the car by turning the motor driver pins on and off.
The Blinkit app was used to send commands to the car over WiFi. The app was connected to the ESP32 microcontroller by entering the IP address of the microcontroller in the app's settings. The app provided a simple interface with four buttons to control the movements of the car: forward, backward, left, and right.
With this setup, I was able to control the robo car wirelessly over WiFi using the Blinkit app. You can see it in the picture below.

Project 2: Hand Gesture Robot
As I progressed, I decided to take on a more challenging project. So we (with my classmates) built a hand gesture-controlled robot car that can be controlled through the movement of the hand. we used a band that was worn on the hand and connected to the car via Bluetooth. The band had an accelerometer and gyroscope that detected the movement of the hand and sent signals to the car. This project required a lot of programming and calibration, but the end result was worth it. It was amazing to see the car move in response to the movement of the hand.
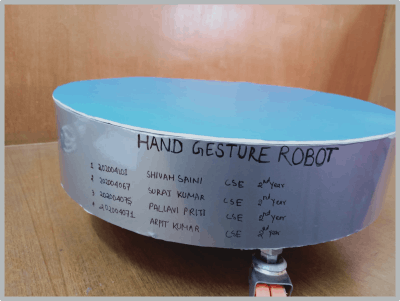
Stay tuned as we discuss this in more detail in upcoming blogs.
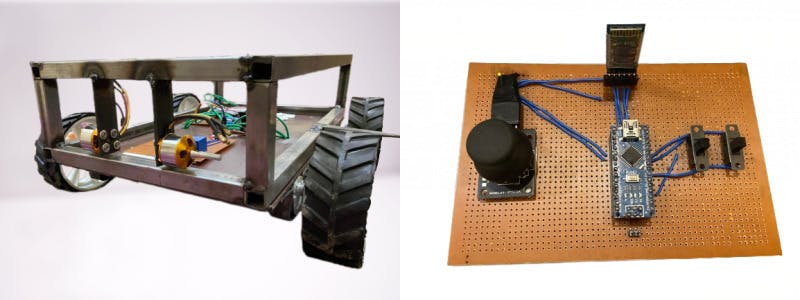
Project 3: A Warrior Car
I am currently working on my most ambitious project yet - building a warrior car that can compete in robo wars. This project has required extensive planning and designing to create a heavy-duty metal body capable of withstanding collisions. To control the car, I am using an Arduino board and incorporating various sensors and weapons for added power. One of the weapons I have added is a blade that functions as a cutter. I am excited to share with you all the difficulties and learnings I encounter throughout this project once it is completed and ready to be unveiled.
Happy Learning! ✌️
Thank you for reading this blog about my experience with three different robo car projects. I hope it has been informative and inspiring for those who are interested in exploring the field of IoT and robotics.
In the next sequence of this blog, we will dive deeper into these projects and discuss more about the tools and techniques used to build them. Additionally, we will discuss the basics of IoT, how it works, and provide a step-by-step guide to creating your own beginner-friendly IoT project (Smart Home Security Systems) that you can try.
If you have any questions or comments about the robo car projects or any other tech-related topic, please feel free to leave them in the comments section below. I would be happy to hear from you and to provide any further assistance that I can.
So, stay tuned for the upcoming blogs, where we will discuss more about these exciting topics and learn together!